How to Clean RV Air Conditioner Coils Safely
Posted by Brands Hut on Sep 27th 2026
A rooftop AC that runs constantly but delivers weak, lukewarm air often has a simple problem: restricted airflow across dirty coils. Learning how to clean RV air conditioner coils is one of the most useful maintenance jobs an RV owner can handle. It can improve cooling performance, reduce strain on the compressor, and help you spot damaged parts before a hot-weather trip turns into an urgent repair.
Your RV air conditioner works in a harsher environment than a home system. Road dust, pollen, cottonwood, salt air, leaves, and insects collect under the rooftop shroud. Inside, fine dust can bypass a neglected return-air filter and build up on the evaporator coil. A little seasonal attention goes a long way, especially for full-time RVers and campers who travel through Florida heat, desert dust, or wooded campgrounds.
Know Which RV AC Coils You Are Cleaning
Most rooftop RV air conditioners have two separate coils. The condenser coil sits in the outdoor section beneath the rooftop shroud. It releases heat pulled from the cabin, and it is commonly exposed to dirt, debris, and insects. The evaporator coil is on the interior side of the system, above the ceiling assembly. It absorbs heat from the RV air and is more likely to collect fine dust, lint, and residue from indoor humidity.
Both coils need clear airflow, but they should not be cleaned the same way. The outdoor condenser coil can usually tolerate a light rinse if water is kept away from electrical components. The indoor evaporator coil requires more control. Excess water inside the return-air area can create a mess, damage finishes, or lead to moisture problems if the condensate pan and drain paths are blocked.
Before removing anything, identify your AC model and confirm the shroud, ceiling assembly, and filter arrangement. Coleman-Mach, Dometic, Advent, Furrion, and other common RV brands use different panel layouts and fastener locations. A quick look at the model label can prevent broken plastic tabs or an incorrect replacement part order later.
What You Need Before You Start
This is not a complicated job, but working on a roof-mounted appliance calls for the right basic equipment. Have these items ready before you climb the ladder:
- A stable ladder, non-slip shoes, and a helper if possible
- A screwdriver or nut driver that fits your shroud fasteners
- A soft brush and a vacuum with a brush attachment
- A no-rinse evaporator coil cleaner rated for HVAC use
- A garden hose with low-pressure spray capability
- Gloves, eye protection, clean rags, and a fin comb if fins are bent
Do not use a pressure washer, stiff wire brush, or highly caustic household degreaser. Aluminum fins bend easily, and flattened fins restrict airflow just as surely as dirt does. Avoid spraying cleaners or water directly into fan motors, control boards, capacitors, wire connections, or thermostat sensors.
Shut Down Power Before Opening the Unit
Turn the air conditioner off at the thermostat, then disconnect shore power and switch off the appropriate breaker. If your RV has a generator, make sure it cannot start during the work. For the safest approach, disconnect the coach battery if you will be working near exposed electrical connections.
AC rooftop units use high-voltage power and contain capacitors that can hold a charge. Routine coil cleaning does not require touching electrical components. If you see burned wiring, swollen capacitors, oil stains, damaged insulation, or a loose electrical box cover, stop there and have the unit inspected by a qualified RV HVAC technician.
Clean the Outdoor Condenser Coil
Start at the roof. Remove the plastic shroud carefully and set the screws aside where they will not roll off the RV. Inspect the shroud for cracks around mounting holes, since a loose or broken shroud can create noise and expose the AC unit to unnecessary weather damage.
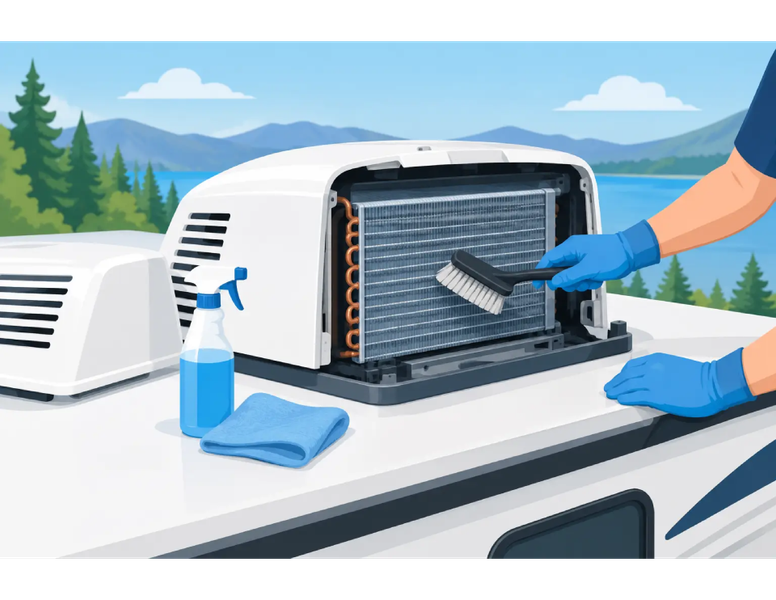
With the shroud removed, clear loose leaves, nests, and dirt by hand or with a vacuum. Then use a soft brush to gently loosen debris from the condenser coil surface. Brush in the direction of the fins, not across them. If the coil is moderately dirty, apply an HVAC coil cleaner according to the product instructions. A foaming cleaner can help lift oily grime, but use only as much as needed.
Rinse the coil with a gentle stream of water. The goal is to wash debris out of the fins, not force it deeper into the unit. Keep the spray controlled and pointed away from the electrical compartment. If the coil is not heavily soiled, a careful dry cleaning may be enough.
Look closely at the fin surface once it is clean. A few bent fins are common on older units. Straighten them slowly with a fin comb matched to the spacing of the coil. Do not expect every fin to look perfect. The practical goal is to restore open air passages without tearing the thin aluminum.
Clean the Indoor Evaporator Coil and Filter Area
Back inside the RV, remove the return-air grille or ceiling assembly cover following the instructions for your unit. Take out the foam or mesh filter. If it is washable, rinse it with mild soap and water, allow it to dry fully, and reinstall it only when it is dry. If it has deteriorated, hardened, or will not come clean, replace it.
Use a vacuum with a soft brush attachment around the return-air opening and accessible evaporator coil face. Be gentle. The evaporator fins are easy to damage, and pushing debris into the coil can make the problem worse.
For visible residue on the coil, use a no-rinse evaporator coil cleaner designed for indoor HVAC applications. Protect nearby ceiling surfaces with towels and use the product sparingly. No-rinse cleaner is usually the better choice here because it is formulated to drain away with normal condensate rather than requiring a heavy water rinse.
While the cover is off, inspect the condensate pan and drain area for dust, slime, or standing water. A blocked drain path can cause water to drip into the RV rather than onto the roof. Clean accessible debris with a rag. If you cannot see where water is supposed to drain or suspect an internal blockage, professional service is the safer call.
Reassemble and Check Airflow
Let cleaned components dry, reinstall the filter and ceiling assembly, and replace the rooftop shroud. Make sure every screw is secure but do not overtighten plastic mounting points. Restore power, set the thermostat to cool, and let the system run for 10 to 15 minutes.
You should feel a steady stream of cooler air at the supply vents. The difference between return-air temperature and supply-air temperature is commonly around 15 to 20 degrees under normal operating conditions, though outside temperature, humidity, duct design, and RV insulation all affect the result. Stronger airflow is often the first improvement after coil and filter maintenance.
Do not judge performance only by how cold the air feels at one vent. A roof AC may still struggle during extreme heat if the RV is parked in direct sun, windows are uncovered, or the unit is undersized for the coach. Cleaning helps the system work as designed. It cannot make a 13,500 BTU unit perform like a larger 15,000 BTU model.
How Often Should You Clean RV Air Conditioner Coils?
For many weekend RV owners, cleaning the filter monthly during the camping season and inspecting the coils once a year is reasonable. More frequent service makes sense if you camp in dusty areas, travel on unpaved roads, have pets, run the AC daily, or spend long periods near trees and pollen-heavy areas.
An annual roof inspection is also a good time to check the shroud, mounting bolts, foam roof gasket area, wiring, and drain paths. Catching a cracked shroud or deteriorating filter early is less expensive than dealing with water intrusion or a failed AC during a trip.
When Cleaning Is Not Enough
Dirty coils are not the only cause of poor cooling. If the unit still has weak airflow after cleaning, inspect the filter installation and ceiling assembly for gaps that let air bypass the return path. If airflow is strong but the air is not cooling, the issue may involve the compressor, start capacitor, thermostat, freeze sensor, control board, or sealed refrigerant system.
Watch for symptoms that deserve professional diagnosis: repeated breaker trips, ice forming on the evaporator coil, loud compressor hum without cooling, a burning smell, water leaking inside after drains are clear, or a fan that will not start. RV rooftop air conditioners are typically sealed systems, so low refrigerant is not a DIY recharge job. A leak must be found and repaired before refrigerant work has any value.
If inspection shows a cracked shroud, damaged ceiling assembly, failed fan motor, or an aging unit that cannot keep up with your RV, match replacement parts by brand and model number rather than appearance alone. Brands Hut can help RV owners compare compatible rooftop AC components and replacement equipment before they order.
A clean coil will not solve every air-conditioning problem, but it gives your system the airflow it needs to do its job. Make this check part of your regular RV maintenance routine, and you are far more likely to hear the fan running on a hot afternoon with cool air coming through the vents.